First Steps
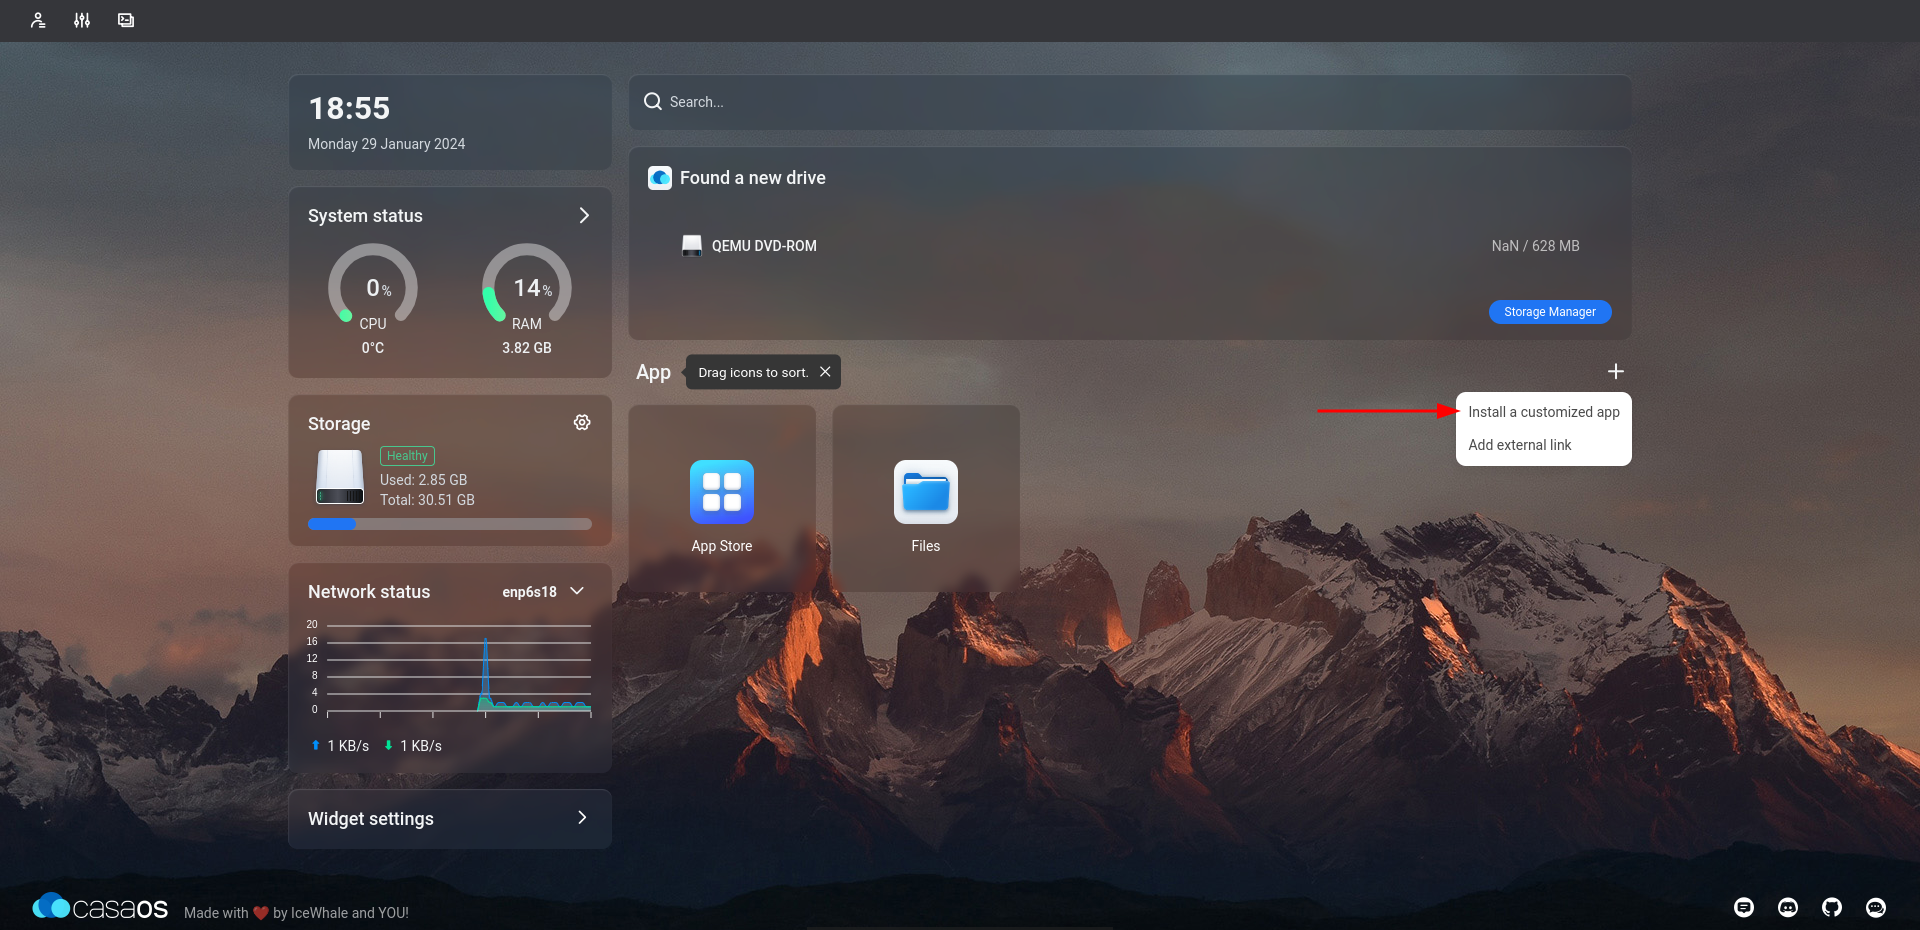
Firstly connect your CasaOS GUI with your favourite browser, then press Install a customized app.
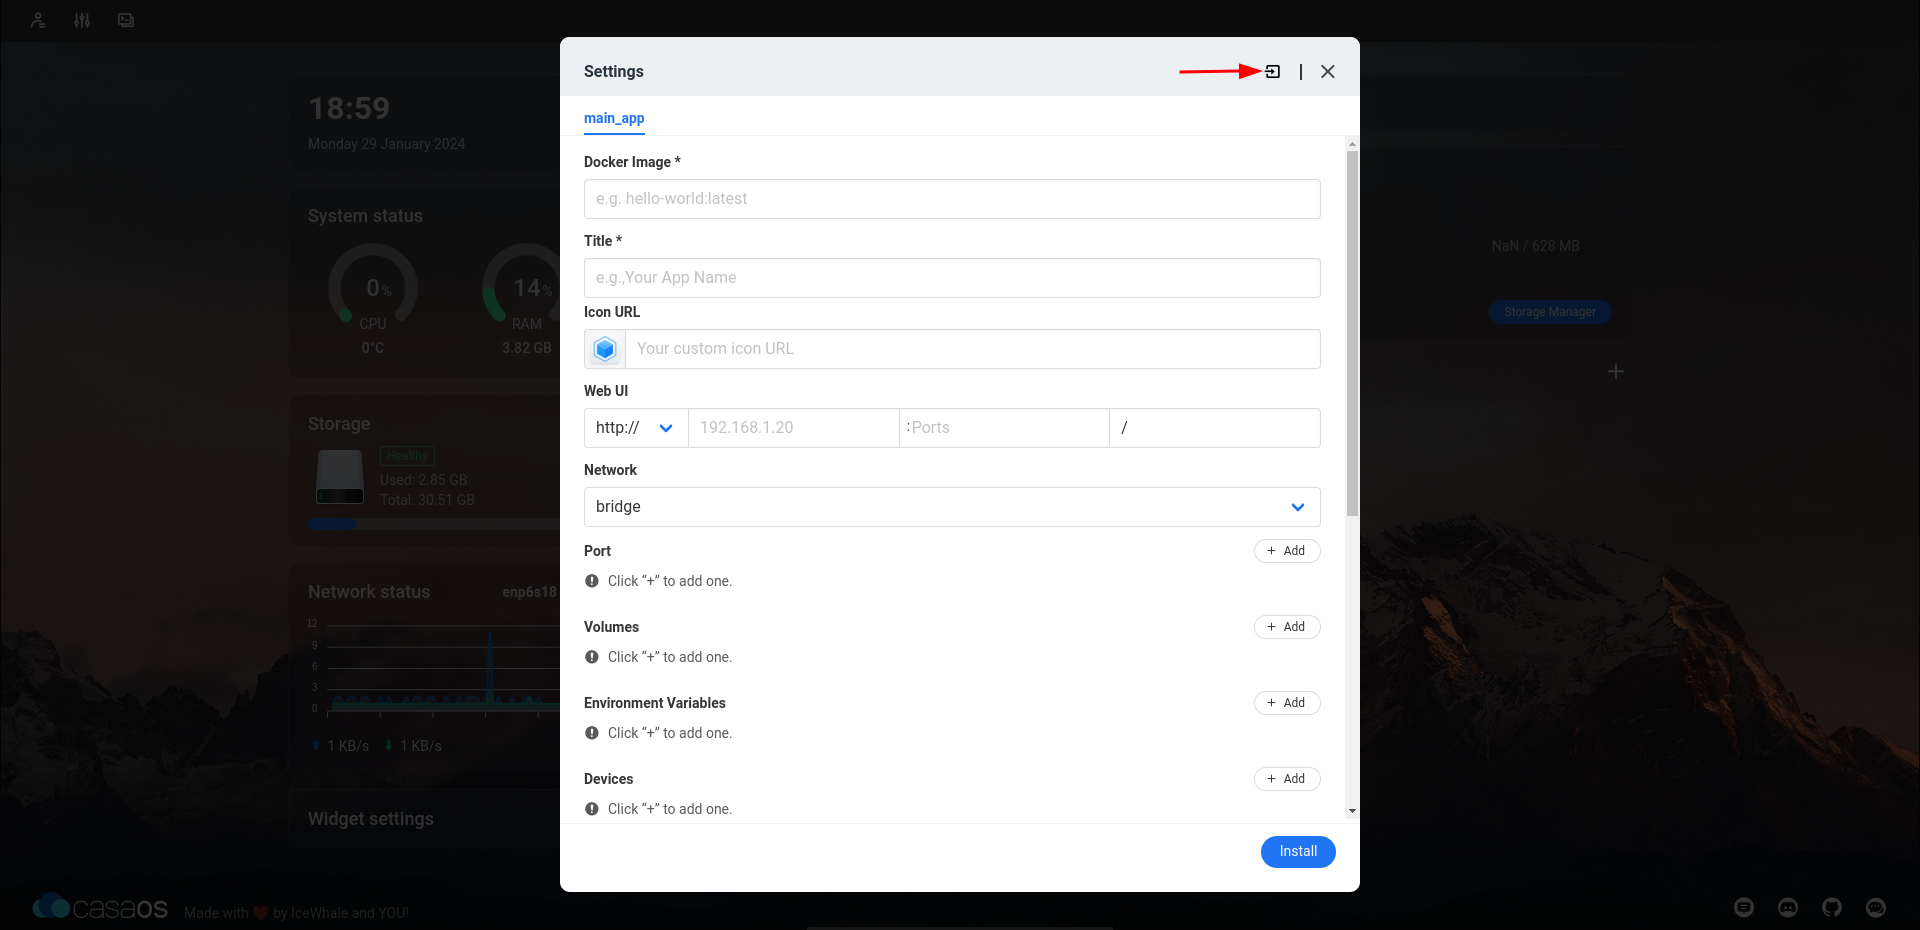
Press import
Installing Nextcloud with Docker Compose File
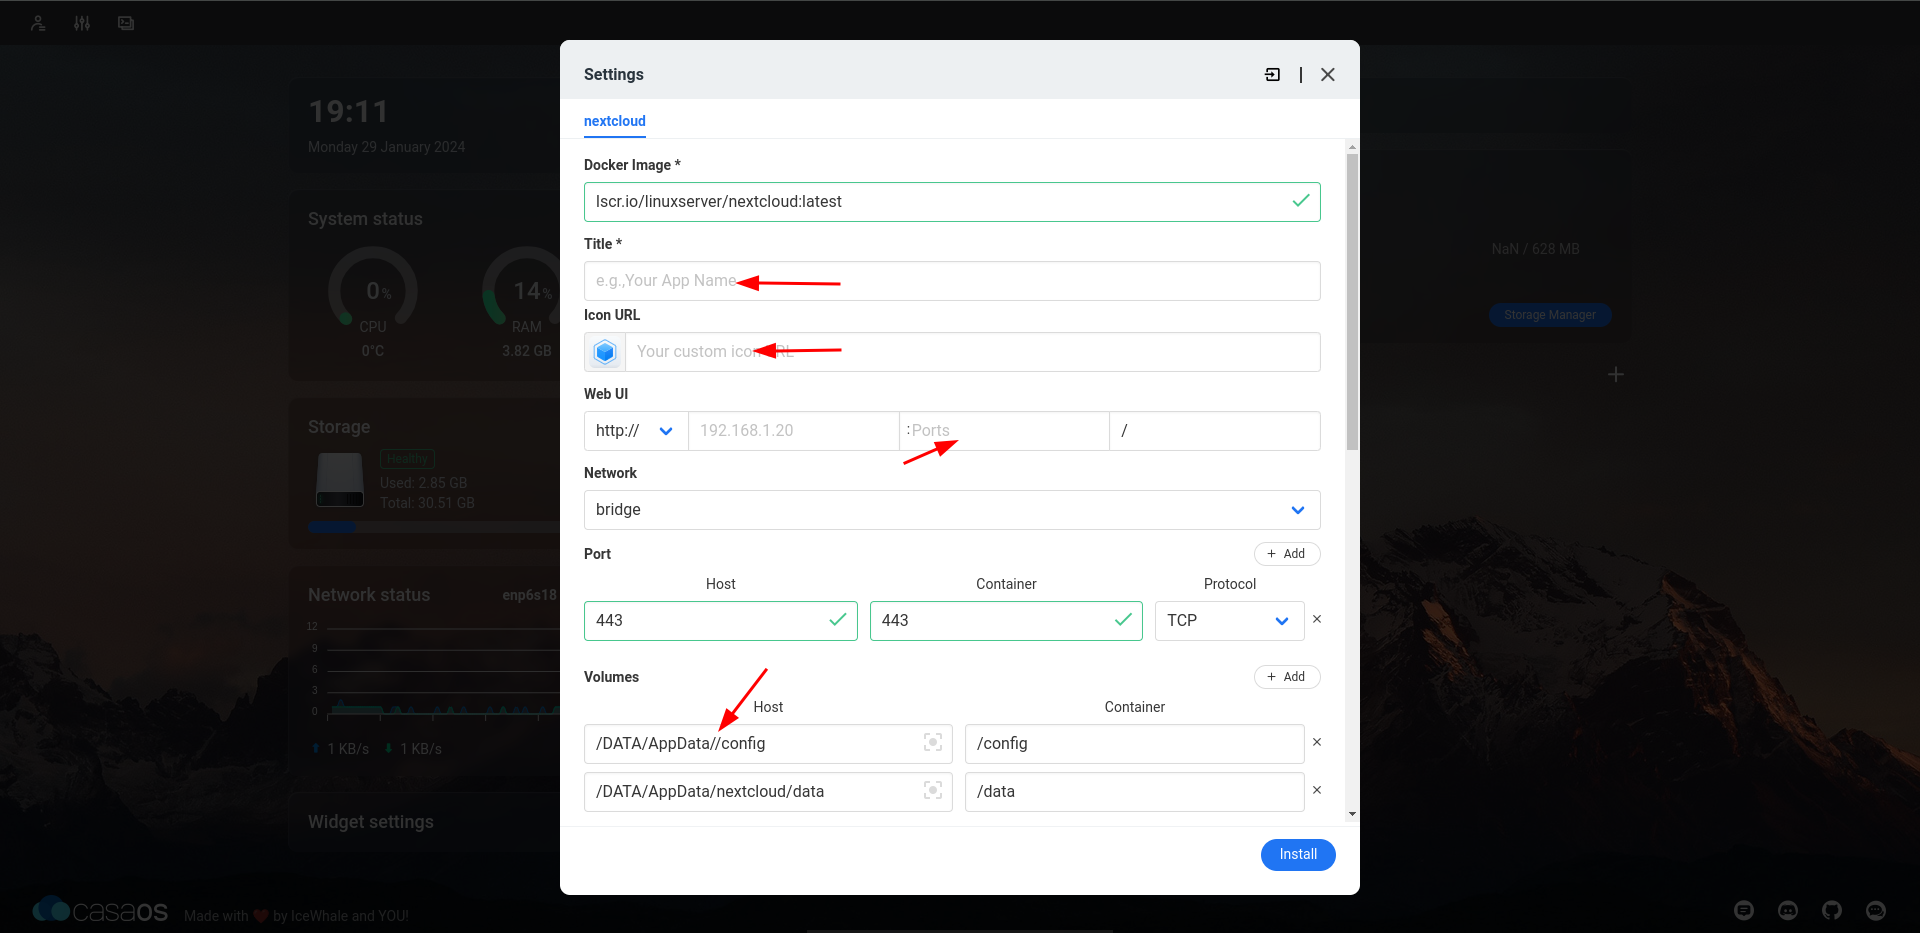
Then copy and paste Docker Compose file inside

Why I did Choose lscr.io/linuxserver/nextcloud:latest Image Instead of nextcloud:latest?
- When I installed with nextcloud:latest some php plugins (like bz2…) not pre-installed.
- Cron not pre-installed and configured.
- lscr image has all but you must configure cron manually.
# This is a Docker Compose version declaration.
version: "3"
# The 'services' key defines the containers that should be created.
services:
# This is the name of the service (container). In this case, it's 'nextcloud'.
nextcloud:
# The 'image' key specifies which Docker image to use for this container.
image: lscr.io/linuxserver/nextcloud:latest
# The 'container_name' key specifies a custom name for the container.
container_name: nextcloud
# The 'environment' key is used to set environment variables inside the container.
environment:
# PUID & PGID are used to set user/group IDs.
- PUID=1000
- PGID=1000
# TZ sets the timezone for the container.
- TZ=Etc/UTC
# The 'volumes' key maps paths on the host to paths in the container.
volumes:
# Map '/DATA/AppData/nextcloud/config' on the host to '/config' inside the container.
- /DATA/AppData/nextcloud/config:/config
# Map '/DATA/AppData/nextcloud/data' on the host to '/data' inside the container.
- /DATA/AppData/nextcloud/data:/data
# The 'ports' key maps ports on the host to ports in the container.
ports:
# Map port 443 on the host to port 443 inside the container.
- 443:443
# The 'restart' key specifies the restart policy for the container.
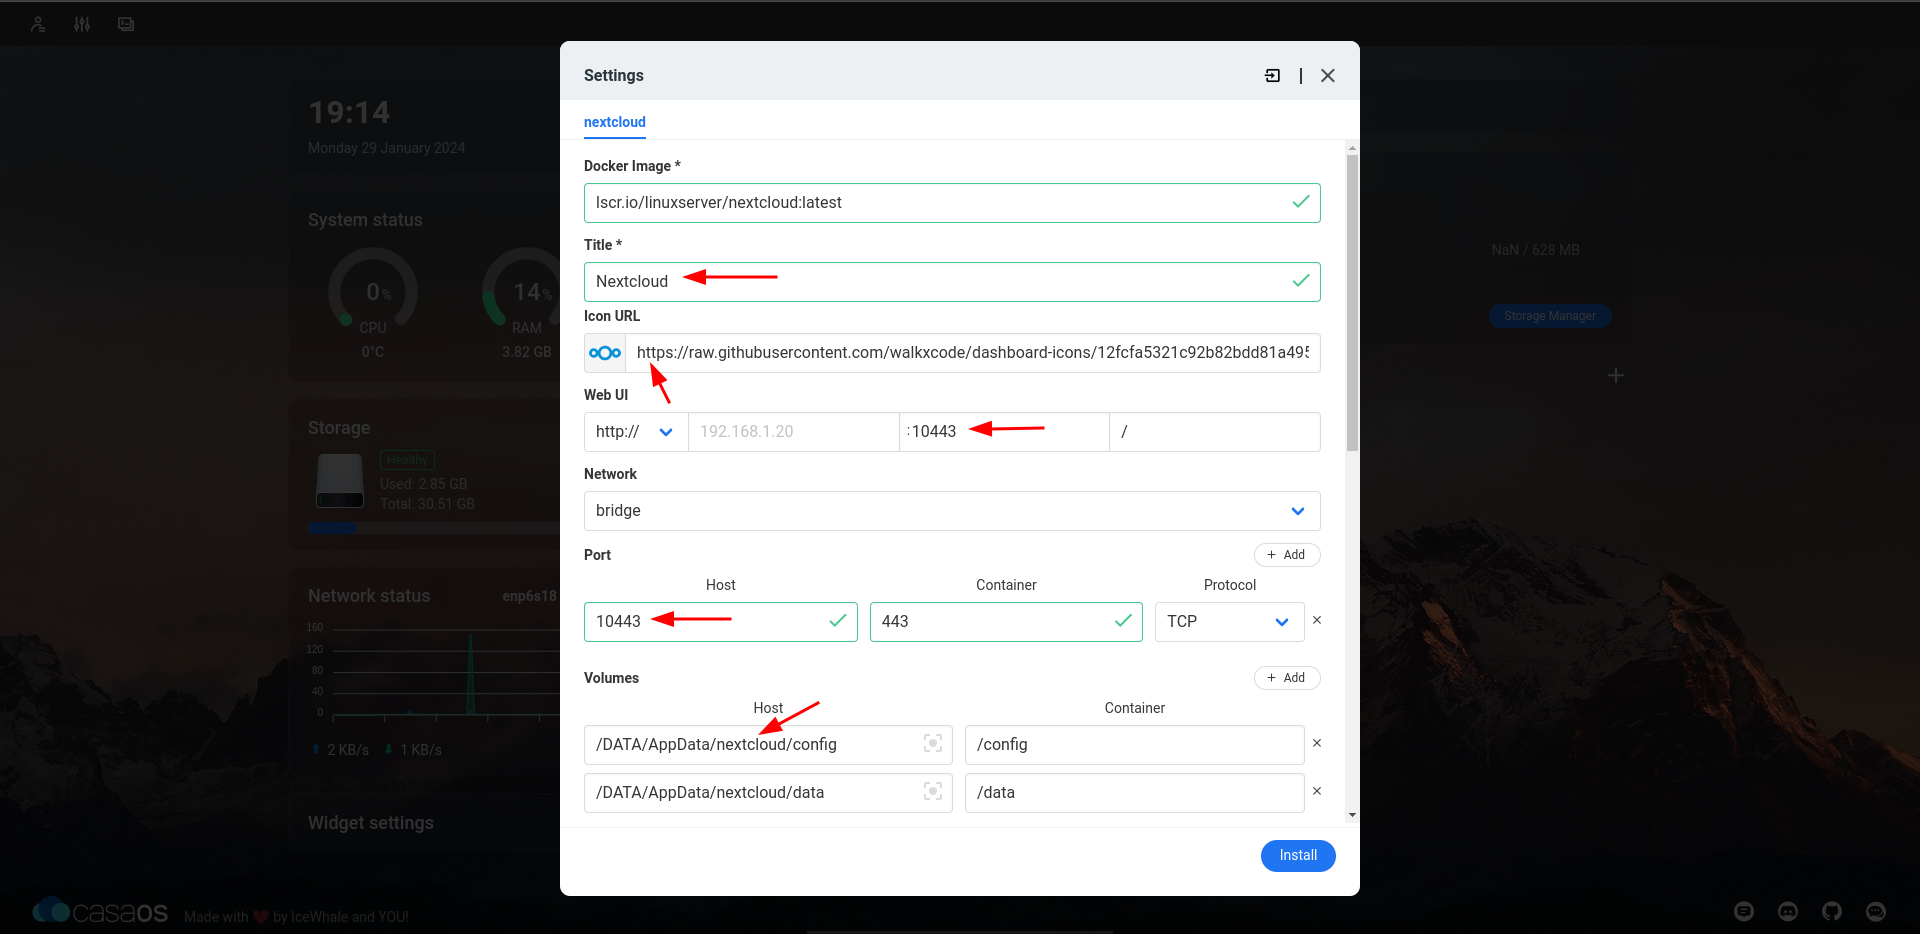
restart: unless-stoppedCheck if you have miss something like this…
Fix like this…
Install it
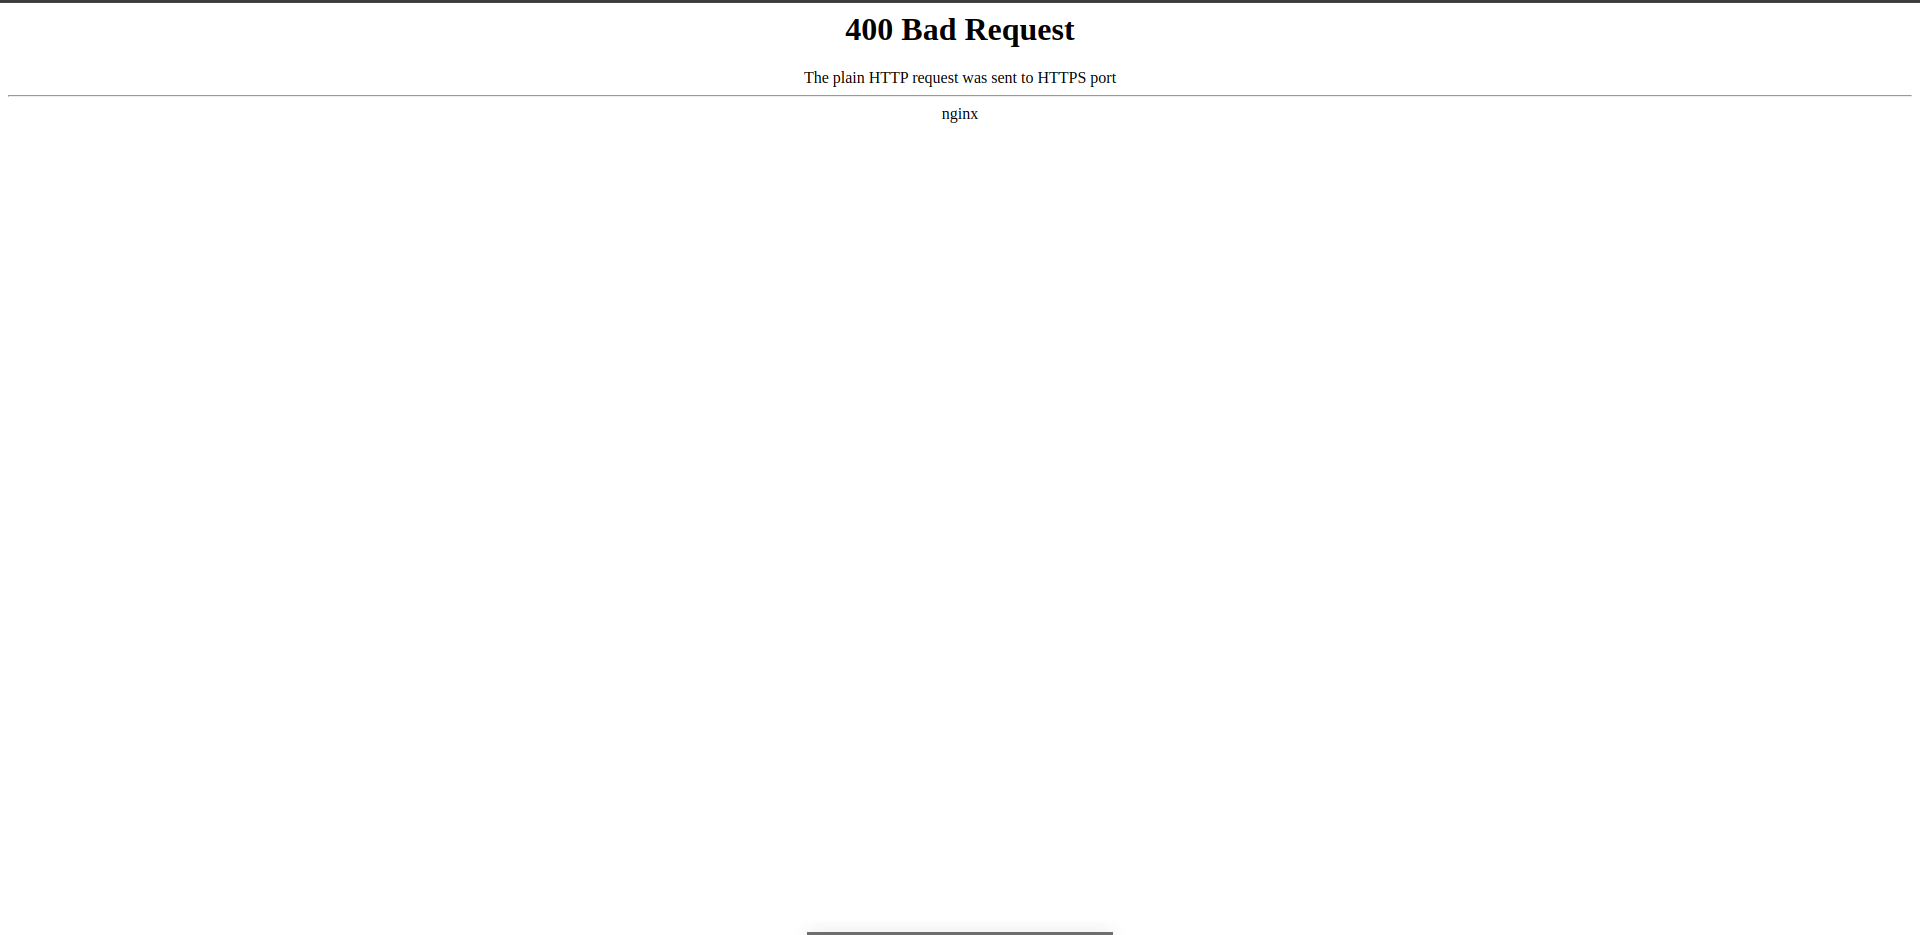
**When you press Nextcloud you’ll see something like this, becouse we configured this just use HTTPS port, if you want to use Nextcloud with HTTP, add Host => 10080 Container => 80 and change Web UI port to 10080 (If you edited image with settings and not working, uninstall nextloud and reinstall again, then apply this settings).
I recommend to use a reverse proxy such as nginx and caddy…
Installing MariaDB with Docker Compose File
We paste this Docker Compose file into place, just like we did in Nextcloud.
# This is a Docker Compose version declaration.
version: "3"
# The 'services' key defines the containers that should be created.
services:
# This is the name of the service (container). In this case, it's 'mariadb'.
mariadb:
# The 'image' key specifies which Docker image to use for this container.
image: lscr.io/linuxserver/mariadb:latest
# The 'container_name' key specifies a custom name for the container.
container_name: mariadb
# The 'environment' key is used to set environment variables inside the container.
environment:
# PUID & PGID are used to set user/group IDs.
- PUID=1000
- PGID=1000
# TZ sets the timezone for the container.
- TZ=Etc/UTC
# MYSQL_ROOT_PASSWORD sets the root password for MariaDB.
- MYSQL_ROOT_PASSWORD=password
# MYSQL_DATABASE sets the name of a database to be created on image startup (optional).
- MYSQL_DATABASE=nextcloud
# MYSQL_USER & MYSQL_PASSWORD are used to create a new user (optional).
- MYSQL_USER=user
- MYSQL_PASSWORD=password
# REMOTE_SQL allows linking to a remote SQL server (optional).
- REMOTE_SQL=
# The 'volumes' key maps paths on the host to paths in the container.
volumes:
# Map '/DATA/AppData/nextcloud-mariadb' on the host to '/config' inside the container.
- /DATA/AppData/nextcloud-mariadb:/config
# The 'ports' key maps ports on the host to ports in the container.
ports:
# Map port 3306 on the host to port 3306 inside the container.
- 3306:3306
# The 'restart' key specifies the restart policy for the container.
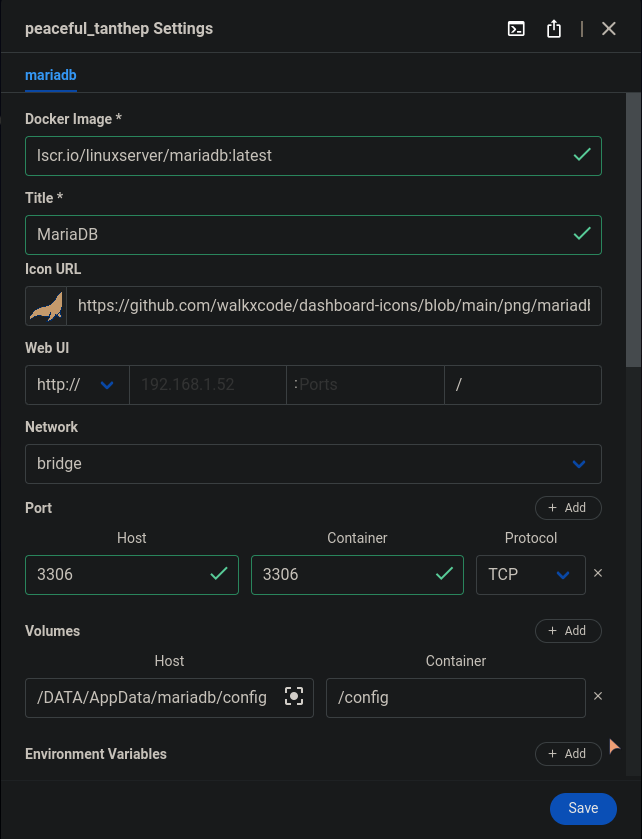
restart: unless-stoppedCheck for type errors and fixing it
Starting Nextcloud with MariaDB
We’ll press Storage & Database and configuring like this…
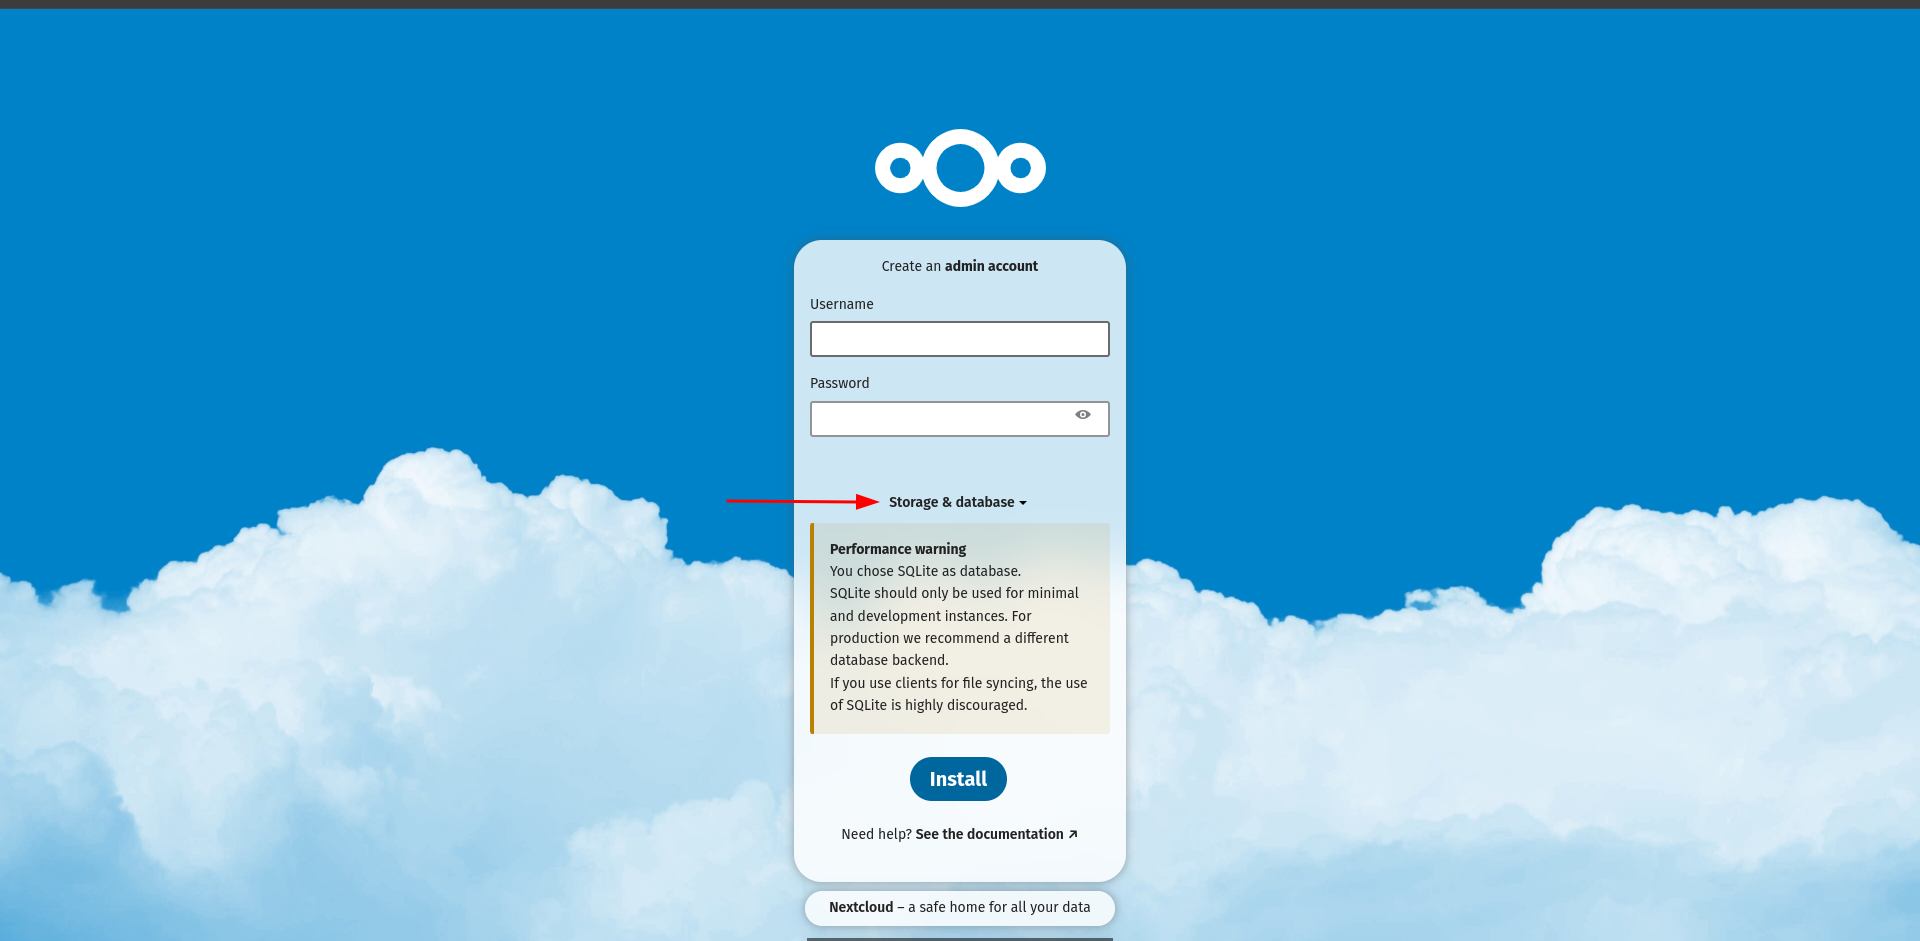
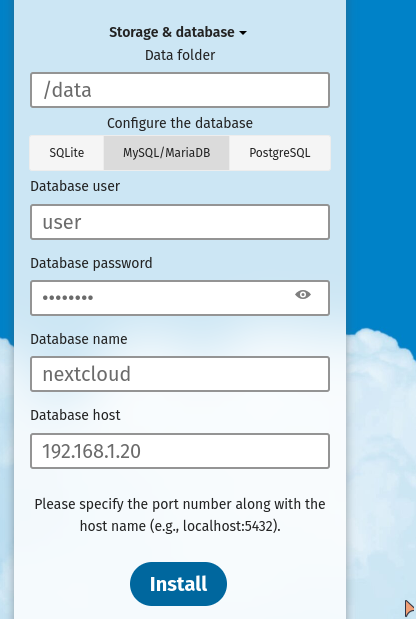
- Database user = user
- Database password = password
- Database name = nextcloud
- Database host = 192.168.1.20 (this is my example local ip, you must enter your local ip) Then press install and enjoy :)